Wednesday, February 25, 2009

Yosemite Firefalls 2-19-09


Firefalls in Yosemite used to refer to the Curry Village 9pm event when a load of burning firewood was pushed from Glacier Point for the enjoyment of the crowd below. Today, Firefalls is a natural event that happens for 10 to 14 days toward the end of February. The setting sun lights up a small section of the rock wall and the Horse Tail Falls looks like it is on fire.....when you get it JUST right-I did not get it just right.....
For years Firefalls has been more of an insider secret, but it was featured in Outdoor Photographer, written about and now on the DNC hotel reservation website There were also numerous $$$ workshops offered in the park for the weekend. Since the rooms were sold out and the prospect of fighting over tripod holes was not appealing, our group decided shooting the Firefalls mid-week was a good plan. Our friend Charlie Phillips has a favorite shot of mine and showed our group the best places to shoot it from.
There are many variables, if it is cloudy nothing to light up with or if it is a dry year, no falls. The first night our group got to the favorite parking lot very early and stood around and waited. It was looking like maybe we would get to see it, but the snow that brought the water for the falls, also got the fog to raise and a thin layer of clouds between us and the sun softened the light to the point there was no Fire in the falls.
The next night, Thursday, we headed back to the parking lot...... just to find it was already packed full with a few people that did not understand what the diagonal lines were for in the parking lot (one car in 3 spaces... 2x), a workshop of 20 people all with the same lenses, cameras and angles talking about the various compositions....(hmmm can we say the same) and the people that found this big open spot to set up their tripod and did not notice it was the exit driveway from the parking lot and did not think they might want to move to allow the cars out of the parking lot. The main road in the park had just been reopened to allow limited access to the parking lot, the lane coming out of the parking lot was already full of people parking and hoping the rangers would not show up. We joined them and left a gap for our group and a few other people to shoot from.
As we discovered, the angle was not the best..... But we were not run down or part of the insanity of $$$ workshops and camera clubs jockeying for the best spot. We did get some good giggles about the people that pulled up late, discovered the people parking on the street, the cars shoved in the snow next to the parking lot and still thought "hey if I drive in the wrong way I am sure to find a parking spot..." Thankfully, no one backed in to us. The wind blew the falls around, the light was fairly soft, and we had too broad of an angle....but next time.
Besides, we only paid the $89 Bed and Breakfast midweek rate for the Lodge, ate til we were stuffed in the morning. Shot all the rest of the day, enjoyed the good company of friends and still got an idea of what we want to see next time in Firefalls.
If you click HERE, it should be a short animated clip (unplanned so a bit jerky) of what the firefalls looked like from the street.

Coyote Springs Ranch


On Wednesday, February 18th, got up super early for a nice drive to take pictures for Charlie Phillips in Mariposa. The Amgen Tour of California was running from Merced on Hwy 140 right past Cathey's Valley and Mariposa on their way to Clovis.

The day was perfect, blue sky and white puffy clouds and not too hot or cold, a big change from the weather just the day before.

Since Charlie could not be everywhere at once, we were covering the riders in Cathey's Valley at the Coyote Springs Ranch. The ranch is a working cattle and guest ranch. Beautiful green hills, a penning ring, party barn and more!

Theresa Castaldi from the Coyote Springs Ranch had put out the flags and made sure the ranch was looking great.
The sun was not cooperating, it wanted to be in the wrong place to shoot the faces of the riders and the ranch as well. But the sun was moving to suit the photographic needs....so it had to be shot at a different angle that hoped.
Waiting on the riders, hoping for that clear shot of Lance Armstrong, but knowing from a previous Amgen Tour, they would zip by fast had everyone hoping for a great view of the race. They tour with a big collection of support cars, photographers, marshalls and other people not on bikes...... I was hoping that the cars would not be blocking the view and that the riders would be spread out.
Luck was on our side, the support cars were not blocking even though they rode the opposite side of the streets fog line, they were still in a smaller bunch, but spread out a bit. Lance was hard to see, but if you looked really hard you could see a bit of his helmet, but for me that was okay. I was shooting the race passing the ranch, not sporting news.
It was a fun shoot with very nice people! I am looking forward to visiting the Coyote Springs Ranch in the future and hope to see it full of guests enjoying the beauty of the area. More photos are here.

Tuesday, February 24, 2009

Winter Challenge Entry


This is my entry in to the "Winter" theme at the Bloggers Community Photo Challenge


Saturday, February 14, 2009

Getting Ready for the Spring Flower Season


Spring is coming quickly to my part of California, we have had a couple of light rains and then a big warm up. This weekend will bring a ton of rain! The flowers in my neighborhood are all ready up and starting to bloom. I am hoping for a long season and a great bloom.
Carol Leigh's website is already posting updates here
One of my new favorite books is California's Wild Gardens
My first destination will probably be Mt Figueroa for the Chocolate Lilies

Tuesday, February 10, 2009

My Bloggers Community Photo Challenge Close Up entry:


Click here for more info
This is my entery in to the Close ups Contest


Tuesday, February 3, 2009

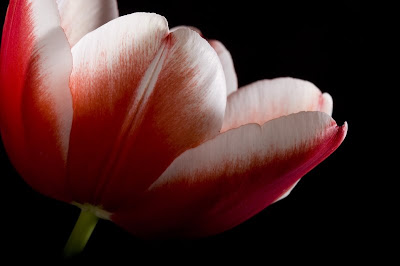
Tulips

Now that I posted how to make a lighting kit on the cheap, I am going to post the photos I took with my real strobes.

We are looking forward to rain this week, a good time to clean up the patio planter and get ready for spring. I had driven past Home Depot and noticed that they had Tulips. I never buy them, but they were calling me.

They were nice models for $4 and are now living their retirement in my planter. More photos of them are here I found a couple of other plants with a bloom on them they are posted over here, I went to my favorite nursery that has the more unique plants. I was really looking for some more natives. I picked up a couple, hmmm guessing Icelandic Poppies are not too native, and headed home to plant them. One looked familiar but the Latin name was not, the label said low flowering plant, so I bought a pony pack. Google showed me that I had bought Columbines, I love them so I was happy. When I cleaned up the planter bed, I discovered my three Columbines from last year that were so happy and bloomed for so long, had sowed seeds and I already had a planters full. So I am going to have a lot of Columbines to photograph later!

Monday, February 2, 2009

Bloggers Community Photo Challenge Hearts 09

I hope I am doing this right, this is my first entry in to the Bloggers Community Photo Challenge http://communityphotochallenge.blogspot.com/


This is my entry:

Heart of Stone

Flowers


I spent the weekend taking pictures of two Tulip plants I bought, one of the lucky things about living in Southern California, the plant departments never closes. The farmers market rarely gets rained out and if your lucky, you have flowers in the yard to use as a subject year round.


So what are these photos of, fake flowers..... But the flowers are really not the subject. I used my background stand and mono block strobes to take the tulip photos, but I was thinking about my snow bound friends with no strobes. Too cold for available light out side, so what do you do it you don't own strobe lights?

You hit the hardware store!


I took this flower photo using a pair of clip lights and 60 watt bulbs. To make a light stand I went to OSH and got some 1/2" PVC parts, I picked OSH because I knew they sell pre-cut small pieces so there would be little cutting. I used only slip connections (not to say I did not find a few threaded ones I had picked up by mistake-double check)

Parts List (one light stand $3.48):
3 x 18" pipes (.29 each)
5 "T"'s (.29 each)
4 caps (.29)

Cut two of the pipes in to 4 6" sections and 4 3" sections, this all the cutting this project took. Do not use glue if you want to make this super portable, if you have a place to store it, just glue the base and not the upright part
1.) attach 2 6" pipes to one of the slip T's at either of the straight side and cap the ends, make 2 sets like this.

2.) attach 2 3" sections like the first sections then attach the 2 longer sections at the "T"


3.) attach an 18" upright with a "T" on top
4.) adjust so the legs rest evenly on the table and the upright is straight and your done!

For my table top background stand $6.02:
11 x 18" sections .29 each (so it is easier to collapse or make shorter)
1 slip "T" .29
4 90 degree elbows .19
2 caps .29
3 couplers .14
and the only threaded parts (to add a bit of length to the back support)
1 T threaded coupler (with the angle part threaded) .45
1 slip to threaded adapter .33
1.) the top use; one "T" with a pipe on either side of the straight part of the "T"
2.) attach a 90 degree angle at either end.
3.) Make 2 uprights for the sides with 2 pipes and a coupler
4.) Make 2 legs using a cap at one end and a 90 degree angle at the other
5.) attach top to legs and legs to feet.....It will want to tip over so set something on the feet at this point. A bag of beans works well for this.
6.) back support; attach 2 pipes together with a coupler, at one end attach the threaded adapter and screw on to the angle part of the T
7.) attach to the center of the top and angle backwards for stability.
Now the fun begins! A towel, sheet, fabric, throw....use for your back ground or shorten one section of pipe and use foam core.
If you take this outside in your garden, remove the feet and add couple of water bottles and rubber bands to the legs and back support.
If your going to the wildflowers (like I plan) you might want to get 4 24" pipes. Use 2 for the sides with out the coupler, one for the back and cut one in half for the top with a "T" in the center.
This all will store easily in a bag and you can always use later for your sprinkler system. Think Tinkler Toys......
Oh, don't forget to set your camera for tungsten! You may want to use stronger bulbs, if you use fluorescent, set your camera to match. In RAW you can make adjustments too. You will need to either up your ISO or use a tripod. If you don't have a macro, try your widest lens, they usually have a better Depth of Field, but you will make what ever is closest to the lens look even bigger than it is, have fun!